
Hat Cameras for Training
Questions? Email info@mwfoa.com
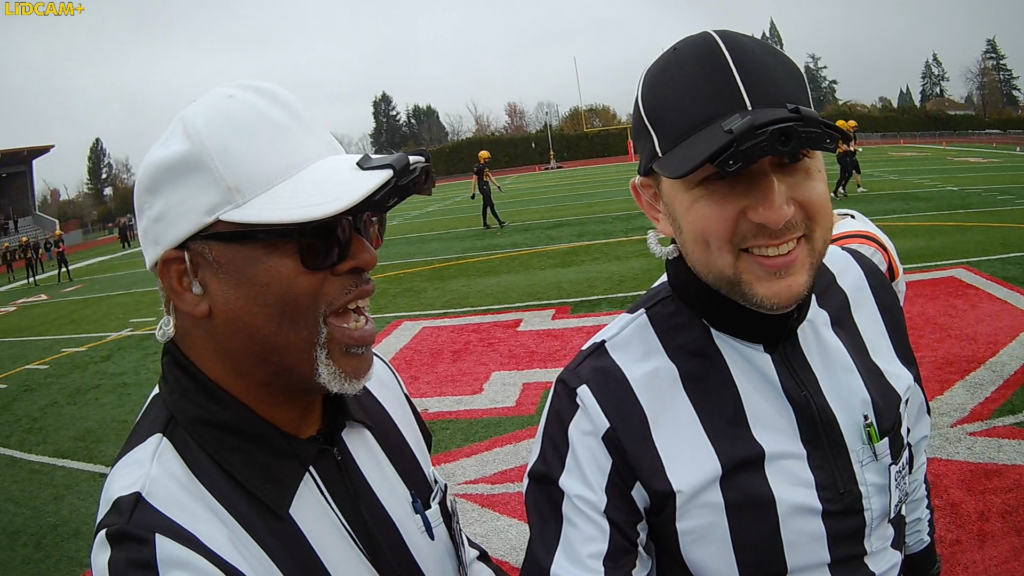
Since 2022, our association has used hat cameras as a training tool. What started as a simple way to capture an official’s point of view has become one of the most valuable tools we have for teaching mechanics, positioning, vision selection, communication, and more.
Hat cameras are not about “catching” officials making mistakes. They are about helping officials see the game the way they actually worked it.
Film from the press box or sideline is useful, but it does not always show what an official saw, what was in their field of vision, how they moved, or how interactions occur at field level. A hat camera gives us that perspective.
Why Use Hat Cameras?
Football officiating is a game of angles, timing, and judgment. Many mistakes do not happen because an official does not know the rule. They happen because the official is straight-lined, too close, too far away, looking in the wrong place, or late to adjust.
A hat camera helps identify those things.
It gives officials a chance to review their own movement and decision-making from their actual working position. That perspective is difficult to recreate with traditional game film.
For newer officials, this can be especially helpful. They can see how quickly plays develop, how much information they are trying to process, and how important pre-snap routines are. For veteran officials, it provides a way to fine-tune mechanics, hyper focus to correct specific performance issues and review critical game decisions.
What Hat Cameras Are Best Used For
Hat camera footage is most helpful when it is used for training and reflection. It works especially well for reviewing:
Positioning and Movement
Where was the official at the snap? How did they move during the play? Did they maintain cushion? Did they get too close? Did they get caught standing still?
Keys and Eye Discipline
Did the official start with the correct key? Did their eyes move too quickly? Did they stay with their responsibility long enough?
Angles
Many calls are made or missed because of angle. Hat camera footage can show whether an official had a clear look or whether they needed to adjust.
Communication
Hat cameras often capture verbal communication between officials, players, and coaches. This can be valuable for reviewing crew communication, dead-ball officiating, and sideline management.
What Hat Cameras Are Not For
Footage should not be posted to social media!
Hat cameras should not be used as a “gotcha” tool.
They are not meant to embarrass officials, publicly critique judgment calls, or replace proper evaluation. They are one piece of the training process.
The most productive use is internal review: official to mentor, crew to trainer, or association to training group.
The footage should be treated professionally and respectfully. Officials are more willing to learn from video when they trust how it will be used.
How To Get Started
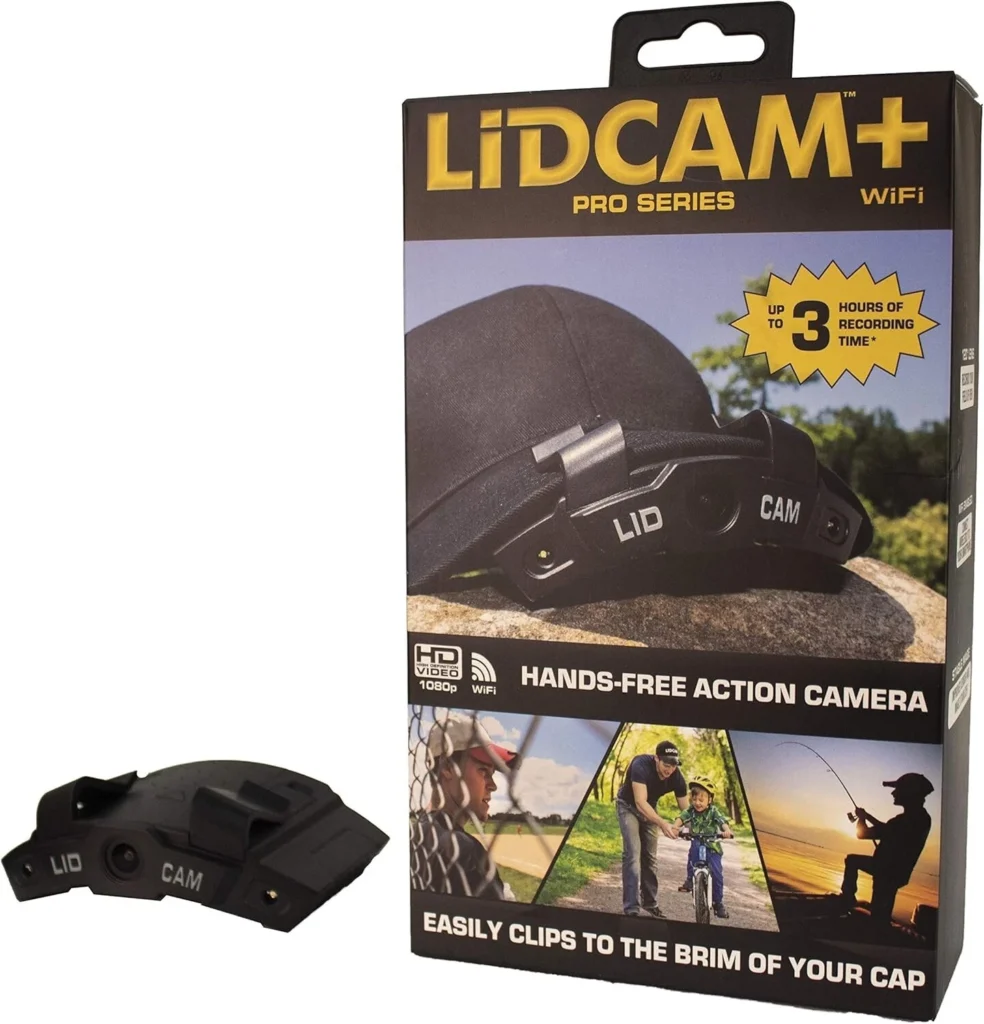
Purchase and Cost
You can find the LidCam+ online. We have paid between $65 to $120 per unit. Over the years the general price per unit ranges from $80 to $110. We have mainly purchased ours through Amazon or E-bay. All units were brand new.
Batteries
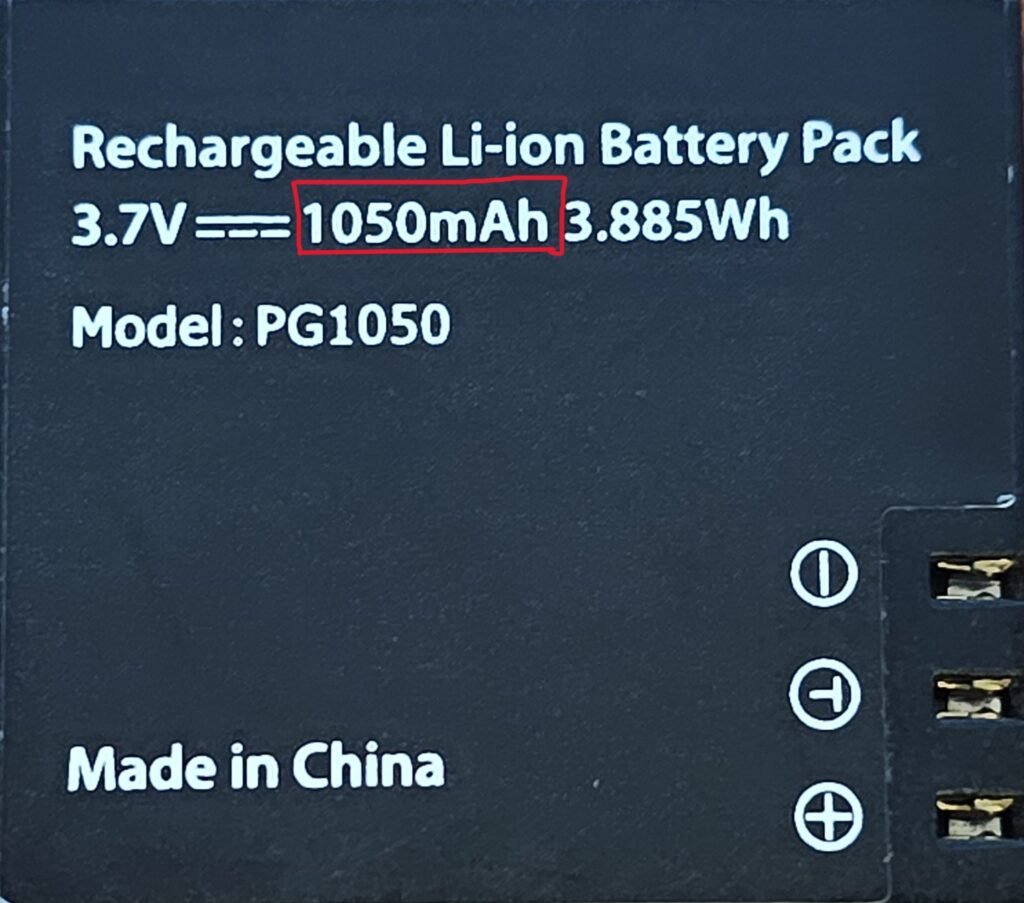
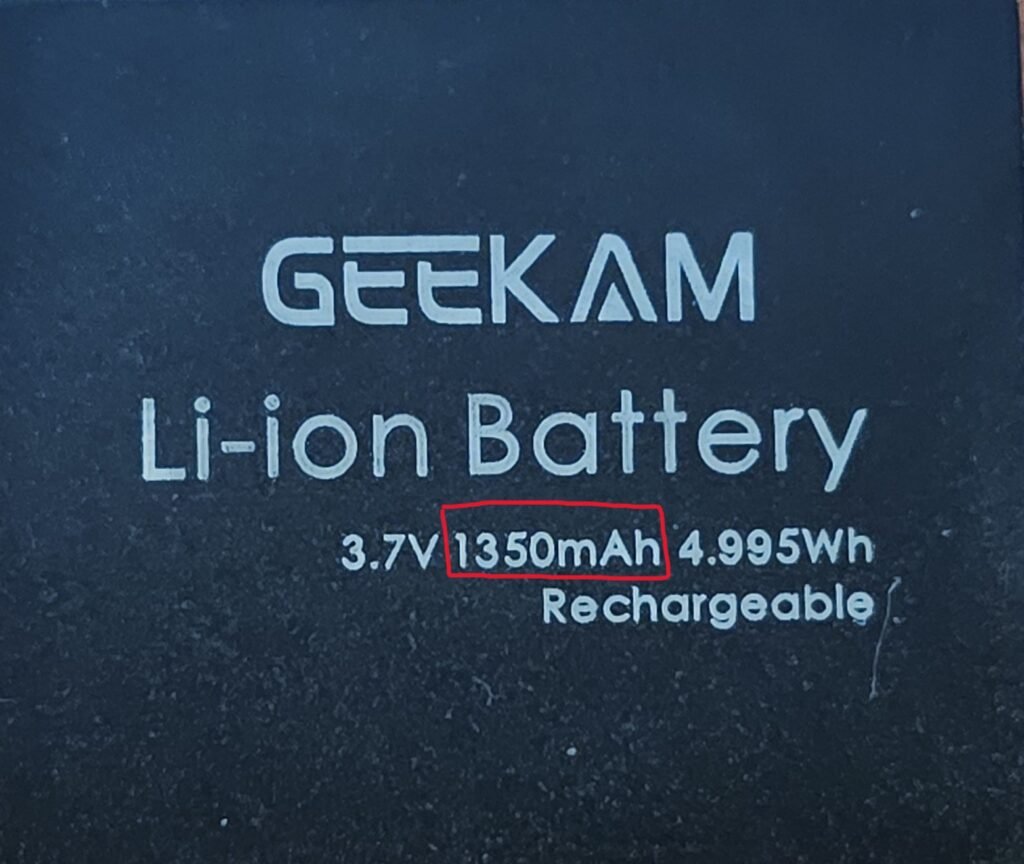
The camera comes with one 1050mAh battery. This will not last the entire game. We recommend you purchase these batteries Action Camera Battery Pack 1350mAh
Storage
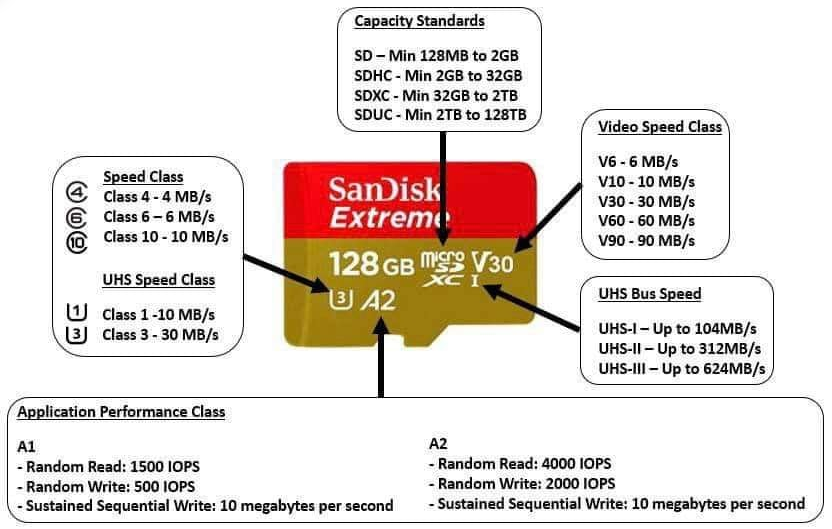
You need a suitable Micro Sd Card for storage. The camera will work with a variety of storage size options. However, we recommend a 64GB card. Make sure your speed class is at least a C10, U1, or V30. Each of those corresponds to a 10 MB/s write speed, which is what you need for this 1080P camera. You may want a larger storage device, but later we will share why the 64GB is the best option.
Card Reader
If you don’t have a card reader, we recommend at least a UHS-II SD Card Reader. A single game may be up to 20GB of data. This card reader, used with a compatible USB-C slot on your computer will significantly reduce the transfer time.
First Use and Setup
- Format SD Card
- Charge Battery and insert into camera.
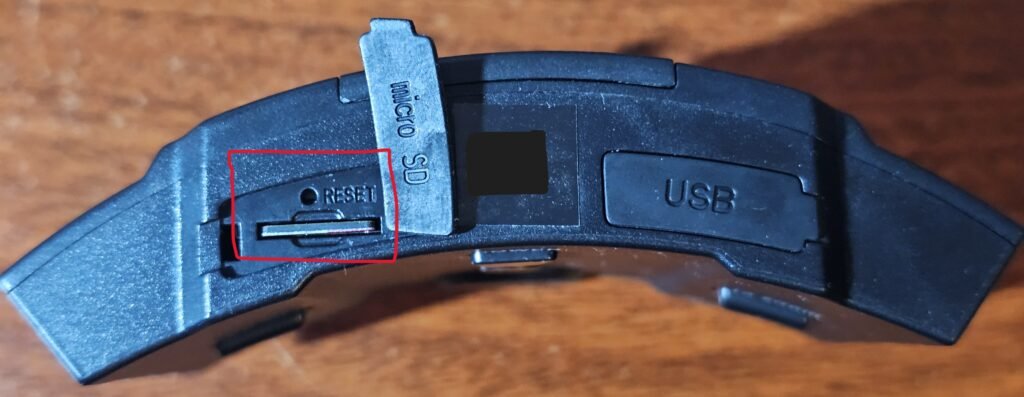
- Insert Micro SD card, but keep SD card flap open.
- Power on device – hold power button until LED is on steady
- Take a paper clip or similar tool and push the RESET button above the SD card slot.
- After pushing the format button, the device should turn off.
- Test Recording
- Power on device – hold power button until LED is on steady
- Start Recording – Push record button, the LED will blink when recording
- Stop Recording – Push record button, the LED will return to steady
- Power down device – Long press power button for 4-5 seconds then release, the LED should shut off.
- Download recording to computer and ensure recording worked.
Regular Use
- Use two batteries per game. One per half. Take the second battery with you
- If you have a 1050mAh stock battery, use that for the first half. Then use the 1350mAh battery for the second-half. This is useful if there is overtime or a drawn out second half.
- Always ensure the zoom feature is set to 1X. The zoom should never be used
- Double check the LED is blinking to ensure device is recording.